
arista's open-source face shield redesign
- Adam
- Mar 26, 2020
- 4 min read
MAKERS: you can download the files for this build on my grabcad site here: https://grabcad.com/library/arista-face-shield-1
Face Shield Redesign
Initial evaluation of the community face shield named “PRUSA”. If you are not familiar with the PRUSA open source face shield design, you can learn more about it here. I have a great amount of respect and admiration for the folks here, so I hope that my following work can build on their shoulders.
Evaluation of the PRUSA design - I can see that it is durable and reasonably well designed. I made a half-dozen prototypes for evaluation. I noted some gripes with the design:

1. Long print time. This is taking me 2 hrs 11min and 42.57g of materials (not including the lower frame). This is using my Makerbot Replicator 2 with PRUSA’s recommended print settings (3 shells, 30% infill). Results may vary depending on your printer and settings, but clearly this is not ideal if trying to produce hundreds or thousands in a few days.
2. Uncomfortable. It might sound ludicrous to have comfort as a requirement in an emergency scenario, when a healthcare worker is faced with wearing something that is uncomfortable versus risking exposure, but I put myself to the test and failed miserably when trying to wear the PRUSA mask in the confines of my home office. After a few hours it had to come off. The pressure points I felt while wearing it became unbearable. I think some level of comfort is a requirement so it can be worn for a period of time with minimal discomfort (i.e. for a workday shift of 8hrs). I can’t imagine a healthcare worker wearing the PRUSA for an 8+ hr shift.
3. Poor attachment of lower mask frame – does not stay attached well and appears to have some printing issues due to the design being too thin to achieve an actual filament bonding, it prints as many small thin shell-layers. Further, if I am to be using .010” thick laminating pouches (2x5mil/side) then I need to provide slightly more clamping force on the shield. I may also want to put a more secure fastener or dab of adhesive to assure it does not come off during use if bumped or snagged on hospital equipment.
4. Poor adhesion of padding – this point is somewhat unfair, as the original PRUSA design does not recommend adding foam. However, due to the discomfort noted in 2, I added a piece of adhesive-backed foam weather stripping to relieve the pressure points. The hexagonal cutouts on the headband prevented good bonding of the foam adhesive, so I was dissatisfied with the result. Upon further review of the use of foam, I later determined that this was not a good idea, as it also provides a potential vector for viral transmission due to the open-cell nature which is difficult to clean. Perhaps a closed-cell foam could resolve the concern, but I would rather spend my time making a more comfortable design rather than optimizing foam selection and adding additional risk.
Redesign Objectives
· Reduce print time 1 hour or less.
· Should be assembled by hand with basic office tools.
· Should be able to read documents through the shield when wearing with similar ease.
· Should be comfortable to wear without the addition of foam padding – this saves significant cost, materials, and assembly time.
· Should cost <$5 per shield to make.
· Should fit a range of head sizes, both male and female, while wearing PPE consisting of mask, glasses or goggles, and a head covering (such as a Tyvek suit, bouffant, or hood).
Design Solution


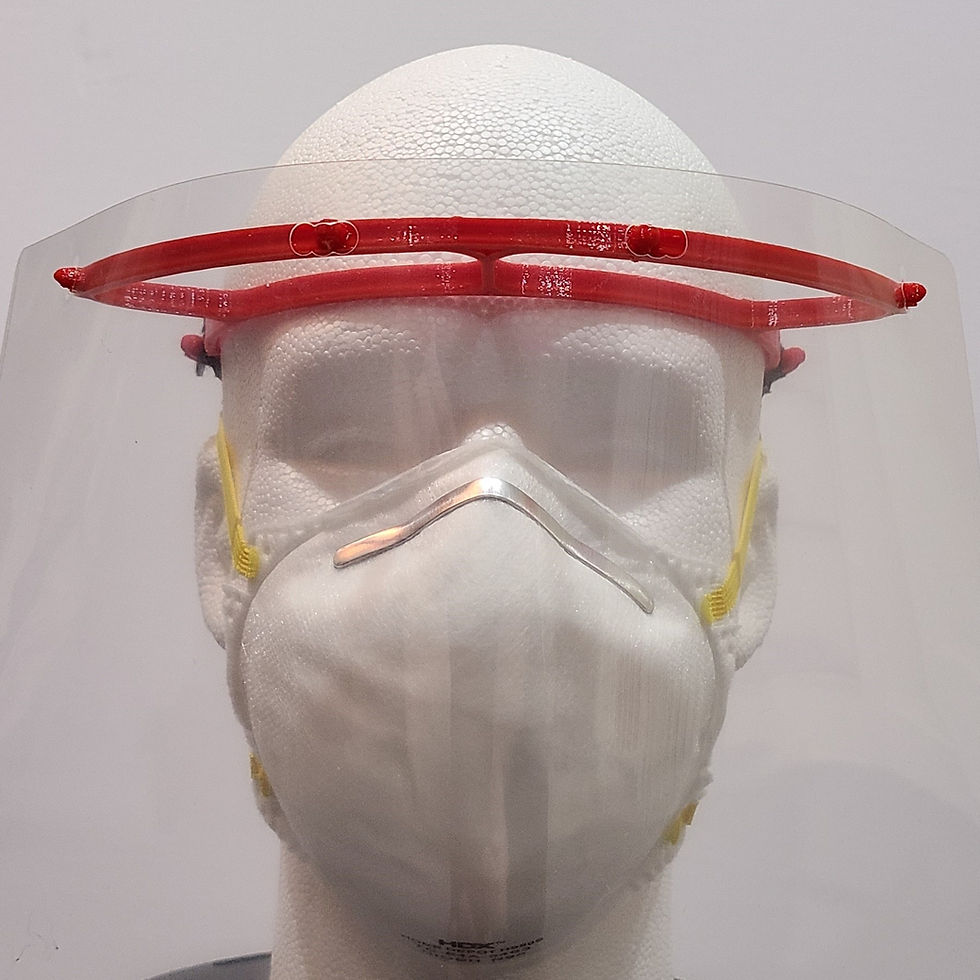
arista FS
Make the frame dramatically thinner. I printed and tested a series of frame thicknesses and found that even down to 0.25” thickness (similar to glasses frames) will support a shield and feel comfortable. This cut the print time down to under 1hr/frame. That’s about 40% of the print time of the PRUSA.
Eliminate the bottom bracket – I opted to design the frame with a larger amount of tension in the sheild. Now there is little need for the lower shield frame as the curvature is held along its length due to the extra tension. So I just got rid of the bracket altogether. Removing the bottom bracket also brings the total print time down by 11 minutes, to 52 minutes at 17.48 g material.
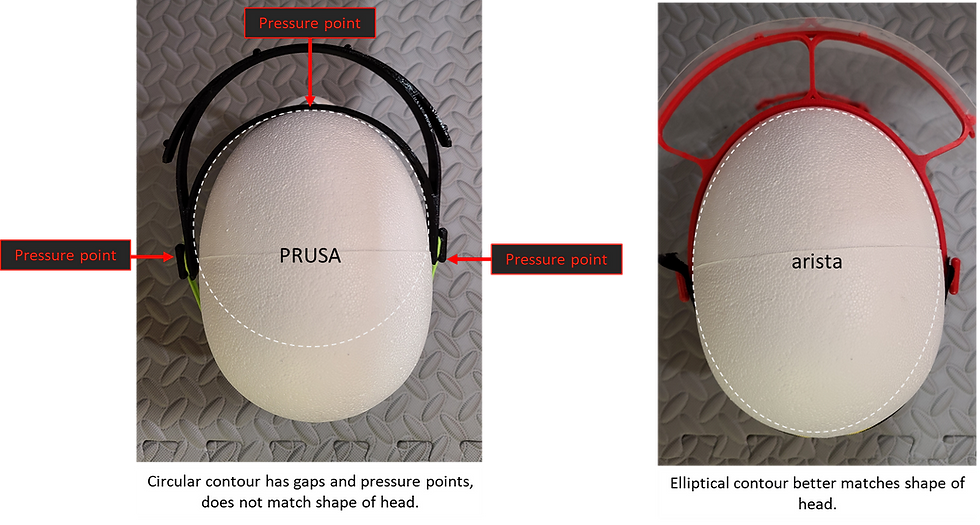
Use an elliptic rather than circular cross-section – using some mannequins, as well as my own noggin, I found that this shape was much more conformal to my head. It eliminated the nagging pressure points that I found on the PRUSA design which, in turn, allowed me to tolerate a thinner band (0.25” thick) since the weight was being distributed more evenly around my forehead.
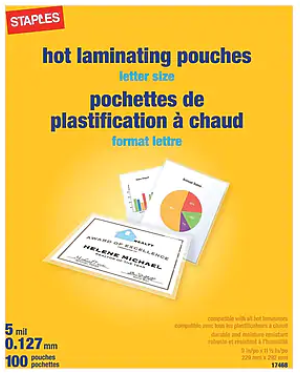
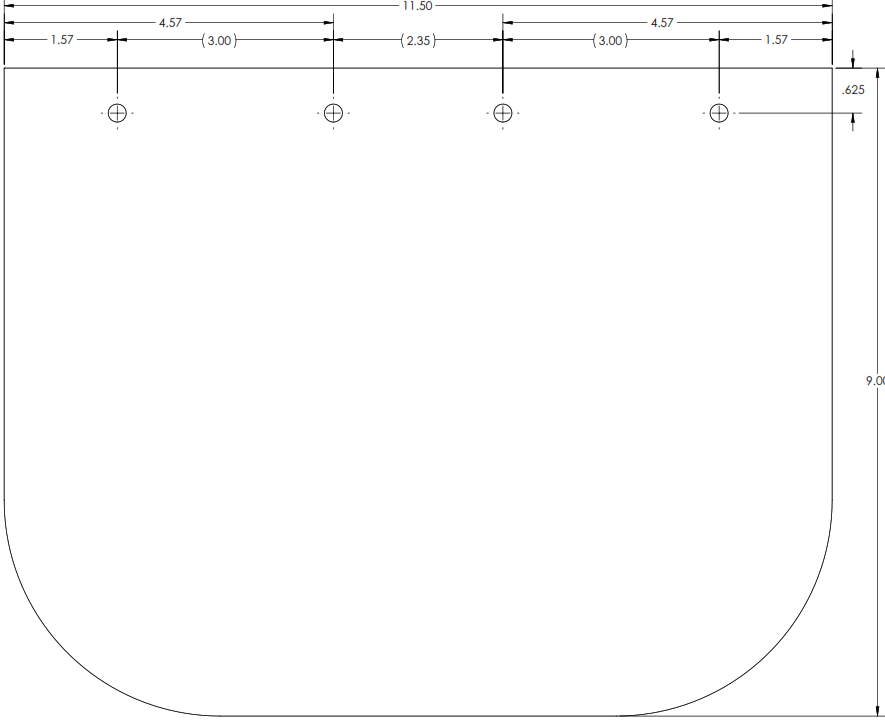
Design tension into the mask-to-frame assembly – this is critical for making a stable shield. The hole spacing of the shield is designed to put the shield into tension during assembly. This allows you to use a thinner material such as the Staples Brand “5 mil lamination pouch” (which is .010” in total thickness). I designed a trim jig to aid manual assembly. Use as below:
Make assembly easier - I designed a small jig that to align and punch holes at the top of the plastic sheeting and can also be used to trace the curve on the bottom of the shield for cutting with scissors or a razor.


Some other notes
I've found that plastic sheeting is very hard to come by and quite expensive. But using 5 mil laminating pouches from staples you can get the cost down to $0.40/shield. It's hard to compete with that on any small batch production run. You'll need to run them through a laminator empty to clear them up and rigidize them. You can see the effect in the video below.
I intend to update this post with final costing information and some details of our assembly/build tomorrow.


Comments